INK AND DIRT DESIGNS
  • SHOP
  • ABOUT
  • SHOP FAQ's
  • CONTACT
  • BLOG
  • ETSY

Creating a Strawberry Piñata

5/13/2015

0 Comments

 
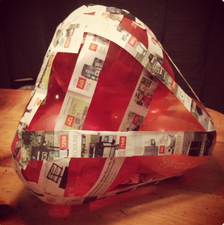
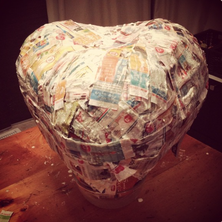
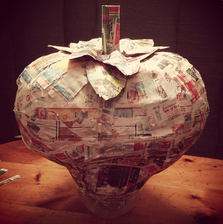
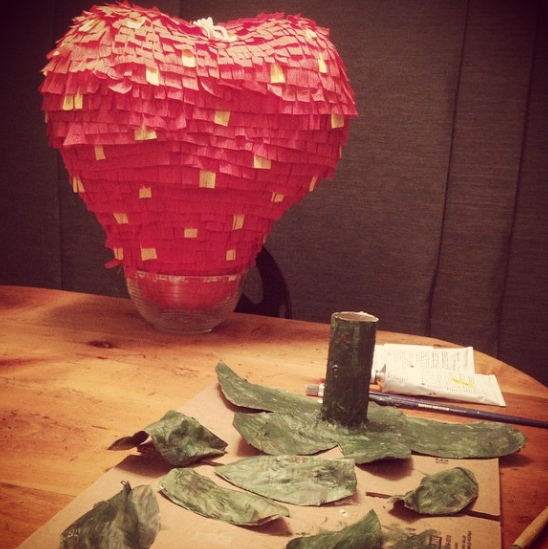
Piñatas have become one of my favourite things to create, like this Joker Piñata and Olaf Piñata. This year my daughter asked for a Strawberry Shortcake party and naturally I decided to make her a giant strawberry for her piñata.

Many people are interested in knowing the process of making a piñata therefore I am sharing my process. It isn't difficult to make a piñata but it does take patience for the drying (this is not afternoon project) and patience to fringe all the streamers but it is not difficult and kinda fun!
What you need:
  • Paper Mache paste (I mix water and flour until it feels  like runny porridge)
  • Newspaper cut into strips
  • Rope
  • Paint
  • Party streamers
  • Scissors and box cutter
  • Hot glue, white glue and tape

Step 1

Picture
Inflate three balloons. Wrap dry newspaper strips around them and secure with tape. This keeps the balloons together and makes the next step easier.

Step 2

Step 3

Picture
Wrap the balloons in newspaper strips soaked in paper mache paste and set it aside to dry. I placed the form into a bowl to dry overnight and flipped it the next day to continue drying.  
Picture
Cut an empty paper towel holder in half and cover in paper mache. Cut some newspaper into leaf shapes and cover in paper mache. Leave loose and once dry, paint all the leaves and stem with Green paint.

Step 4

Picture
Cut a hole on the side of the piñata to fill with candy and to install rope. 
Cut a small hole, big enough to pass a rope through, in the very top.
Cut a rope aprox 2' long, fold in half, knot cut ends together, cover top of knot in hot glue and going through the inside, feed the rope through the top hole leaving the knot securely  glued to the inside top of piñata.

Step 5

Picture
Take Red party streamers in 1 or 2 foot lengths and fray on one side using scissors. Using white glue, attach the non-frayed side of the streamers to the piñata in layers starting from the bottom and working your way up.
Once red is complete, take Yellow party streamers and cut into aprox 1"x2" pieces. Insert randomly throughout the Red of the piñata and secure it with white glue.

Step 6

Picture
Glue the leaves and stem together using hot glue. Place on the top of the Piñata feeding the hanging rope through the middle of the stem (no need to glue it to the piñata).
Fill the piñata with candy and you are ready to bust this strawberry open!
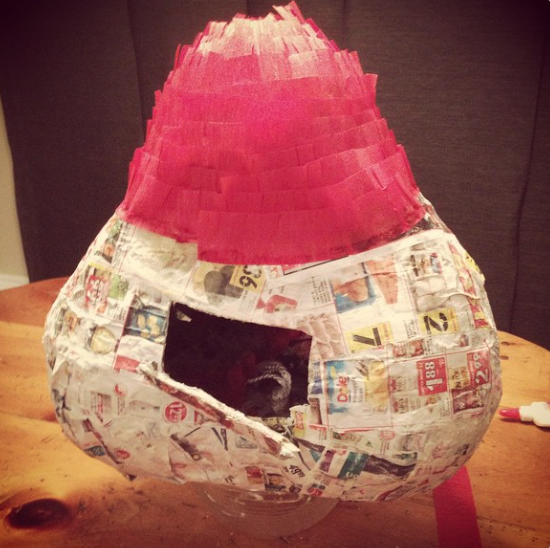
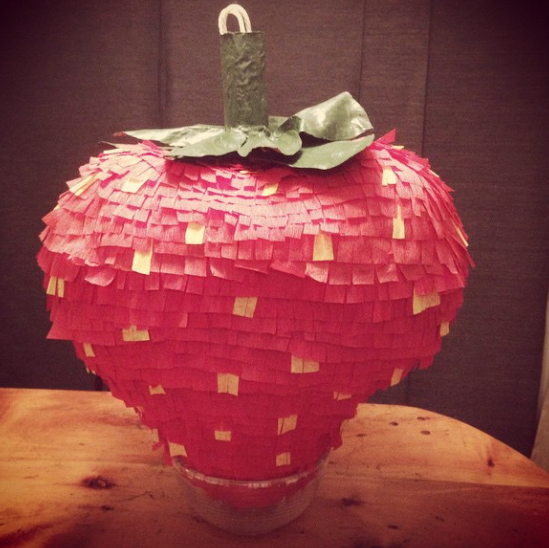
I hope that gives you an idea on how to make this strawberry piñata and how the concept can apply to any shape or character. Let me know if you use these tips to make your own, I would love to see them. Also, I'll be sharing the rest of her Strawberry Shortcake party later this month. 
0 Comments

Your comment will be posted after it is approved.


Leave a Reply.

    WELCOME!

    This is the place where I share my creative projects, endeavors and the stories that inspire my prints.

    ​Why Ink and Dirt Designs?

    You can find out more about the artist behind the prints and the reason behind the name
    Ink and Dirt Design here.  

    ​Thank-you for visiting!


    LET'S CONNECT!

    YOU CAN ALSO FIND US ON

    Picture

    FEATURED HERE

    Picture
    Picture
    Casa Sugar
    Picture
    Picture
    Picture

    CATEGORIES

    All
    30daysketchbookchallenge
    A Little Glimpse
    Craft Shows
    Doodles
    DoodleTime2015
    Etsy
    Free
    Kids
    Landscape
    Life
    Party
    Piñata Projects
    Print Inspiration
    Project2014
    Project 300
    Projects

    Follow on Bloglovin

    THE SMALL PRINT

    All images, designs and content, unless noted otherwise, are ©Karen Gonzalez-Jansen. 
    If you share please link back here for credit.
    ​My creative heart thanks you very much!


INK AND DIRT DESIGNS
EMAIL: HELLO@INKANDDIRTDESIGNS.COM
​© 2020 Karen Gonzalez-Jansen - Ink and Dirt Designs 
  • SHOP
  • ABOUT
  • SHOP FAQ's
  • CONTACT
  • BLOG
  • ETSY